Unable to Stream Video with GStreamer HTTP Server

Description:

Issue Summary:

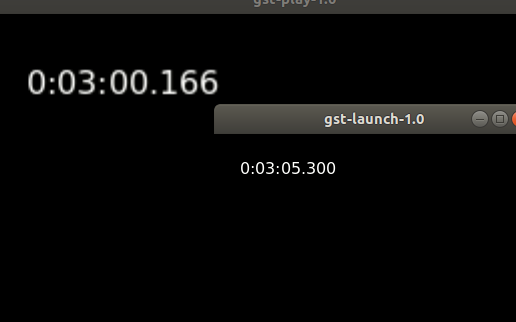
I attempted to stream video using the provided GStreamer pipeline and HTTP server, but encountered several problems. Firstly, when accessing the stream via http://localhost:8080/, the video does not appear on the webpage. Additionally, when attempting to play the stream using VLC media player, it remains in a non-runnable state. Furthermore, I experimented with using an HLS sink, but encountered a minimum latency of 4 seconds, which does not meet my requirements. Subsequently, I tried using souphttpclientsink, but encountered difficulties.

Steps to Reproduce:

  1. Execute the provided GStreamer pipeline:
gst-launch-1.0 v4l2src device=/dev/video0 ! video/x-raw,width=640,height=480,framerate=30/1 ! videoconvert ! queue ! x264enc speed-preset=superfast tune=zerolatency ! h264parse config-interval=-1 ! mp4mux name=mux_av fragment-duration=10 ! souphttpclientsink location=http://localhost:8080/
  1. Attempt to access the stream via http://localhost:8080/ in a web browser.
  2. Try to play the stream using VLC media player.

Expected Result:
The video stream should be visible on the webpage when accessed via http://localhost:8080/, and VLC media player should be able to play the stream without issues.

Actual Result:
The video stream is not displayed on the webpage, and VLC media player fails to play the stream.

Additional Information:
I have also attempted to use an HLS sink to reduce latency, but the minimum latency achieved was 4 seconds, which is unsuitable for my use case. Therefore, I am seeking assistance in resolving these issues and successfully streaming video to both a web browser and VLC media player.

pipeline

gst-launch-1.0 v4l2src device="/dev/video0" ! videoconvert ! clockoverlay ! x264enc tune=zerolatency ! mpegtsmux ! hlssink playlist-root=http://192.168.xx.xx:8080 playlist-location=playlist_test.m3u8 location=segment_%05d.ts target-duration=1 max-files=4

Chrome - http://192.168.xx.xx:8080/playlist_test.m3u8

VLC - http://192.168.xx.xx:8080/playlist_test.m3u8

HTTP SERVER CODE: Server.js

var http = require('http');

http.createServer(function (req, res) {
    // Set the content type to video/mp4
    res.writeHead(200, {'Content-Type': 'video/mp4'});

    // When data is received in the request, write it to the response
    req.on('data', function(data) {
	console.log('STREAM_DATA');
        res.write(data);
    });

    // When the request ends, end the response
    req.on('end', function() {
        res.end();
    });

}).listen(8080);

console.log('Server running at http://localhost:8080/');

Any update regarding above issue?

The httpclientsink sends the media file to an http server using PUT, then it’s up to you to serve that file over http to VLC etc.

In addition to what @stemcc said, I’d suggest to try this simple example (for Linux):

1. Start with no http server running, no streaming command running.

2. Create a test folder:

mkdir hls-test
cd hls-test
HLS_TEST_DIR=$(pwd)
echo $HLS_TEST_DIR

Note the full path to hls-test directory, you will use it later.
Then create an index.html file in that folder with contents (not sure at all this is the best way, just found that as a working archive):

<!DOCTYPE html>
<html>
<head>
<meta charset=utf-8 />
<title>My live video</title>
  <link href="https://unpkg.com/video.js/dist/video-js.css" rel="stylesheet">
</head>
<body>
  <h1>My live video - simple HLS player</h1>
  <video-js id="video_id" class="vjs-default-skin" controls preload="auto" width="640" height="480">
    <source src="http://127.0.0.1:8080/playlist.m3u8" type="application/x-mpegURL">
  </video-js>
  <script src="https://unpkg.com/video.js/dist/video.js"></script>
  <script src="https://unpkg.com/@videojs/http-streaming/dist/videojs-http-streaming.js"></script>
  <script>
    var player = videojs('video_id');
  </script>
</body>
</html>

and save it. Most relevant line is the source tag giving address, port, path and type.

3. Open another terminal for running an http server on port 8080 specifying hls-test directory that you’ve noted above:

python3 -m http.server -d <copy HLS_TEST_DIR path here> 8080

4. If server is running, back to our first terminal where $HLS_TEST_DIR is defined.
Clean up, and start HLS streaming while monitoring with:

rm -f $HLS_TEST_DIR/*.ts
gst-launch-1.0 \
videotestsrc pattern=ball ! video/x-raw,width=320,height=240,framerate=30/1 ! timeoverlay font-desc="Sans, 24" ! tee name=t ! queue ! autovideosink \
 t. ! queue ! videoscale ! video/x-raw,width=640,height=480,framerate=30/1 ! x264enc insert-vui=1 key-int-max=15 tune=zerolatency ! h264parse ! mpegtsmux ! hlssink playlist-root=http://127.0.0.1:8080 location=$HLS_TEST_DIR/segment_%05d.ts target-duration=1 max-files=25

5. Open a 3rd terminal and test:

gst-play-1.0 http://127.0.0.1:8080/playlist.m3u8

firefox http://127.0.0.1:8080/index.html

You may see a few seconds latency.
Hope it helps.

Hi @Honey_Patouceul ,

Thank you for your prompt reply.

After implementing your solution, I observed a latency of 5 seconds, which unfortunately isn’t feasible for my case. Additionally, the bug summary highlights that the hlssink methodology is the cause of this 5-second delay. Consequently, I attempted to address the latency concern by exploring an alternative methodology. Do you have any suggestions on how to resolve this latency issue?

image

Regards,
Sulthan

You may get better latency with no http server running and just using:

gst-launch-1.0 videotestsrc pattern=ball is-live=1 ! video/x-raw,width=320,height=240,framerate=30/1 ! timeoverlay font-desc="Sans, 24" ! tee name=t ! queue ! autovideosink  t. ! queue ! videoscale ! video/x-raw,width=640,height=480,framerate=30/1 ! theoraenc ! queue ! oggmux ! tcpserversink host=127.0.0.1 port=8080

and test from localhost with:

firefox http://127.0.0.1:8080
cvlc tcp://127.0.0.1:8080

Though, you may better explain your final goal for better advice (resolution, format, framerate, more processing than displaying with VLC on localhost ?).
For lower latency, you would try RTSP or webrtc.
You may try RTSP server such as in this python example:

# Note that this example is using Linux for streaming to localhost.
# Things would be different if not using loopback interface.

import gi
gi.require_version('Gst','1.0')
gi.require_version('GstVideo','1.0')
gi.require_version('GstRtspServer','1.0')
from gi.repository import GLib, Gst, GstVideo, GstRtspServer

# Get MTU for your localhost loopback device with (assuming it is named lo):
# ifconfig lo | grep mtu
# and adjust for your case substracting 68 bytes, eg; 65536 ifconfig reported MTU, using mtu = 65536-68 = 65488
MTU=65488
print('Using MTU=%d' % MTU)

Gst.init(None)

mainloop = GLib.MainLoop()
server = GstRtspServer.RTSPServer()
mounts = server.get_mount_points()

factoryMp2t = GstRtspServer.RTSPMediaFactory()
factoryMp2t_pipeline = ('videotestsrc is-live=1 pattern=ball ! video/x-raw,width=320,height=240,framerate=30/1 ! timeoverlay font-desc="Sans, 24" ! tee name=t ! queue ! autovideosink \
t. ! queue ! videoscale ! video/x-raw,width=640,height=480,pixel-aspect-ratio=1/1 ! videoconvert ! x264enc  insert-vui=1 key-int-max=15 tune=zerolatency ! h264parse ! mpegtsmux ! rtpmp2tpay mtu=%d name=pay0' % MTU)
#print(factoryMp2t_pipeline)
factoryMp2t.set_launch(factoryMp2t_pipeline)
mounts.add_factory("/test_rtp-mp2t", factoryMp2t)

factoryH264 = GstRtspServer.RTSPMediaFactory()
factoryH264_pipeline = ('videotestsrc is-live=1 pattern=ball ! video/x-raw,width=320,height=240,framerate=30/1 ! timeoverlay font-desc="Sans, 24" ! tee name=t ! queue ! autovideosink \
t. ! queue ! videoscale ! video/x-raw,width=640,height=480,pixel-aspect-ratio=1/1 ! videoconvert ! x264enc  insert-vui=1 key-int-max=15 tune=zerolatency ! h264parse ! rtph264pay mtu=%d name=pay0' % MTU)
#print(factoryH264_pipeline)
factoryH264.set_launch(factoryH264_pipeline)
mounts.add_factory("/test_rtp-h264", factoryH264)

factoryJPG = GstRtspServer.RTSPMediaFactory()
factoryJPG_pipeline = ('videotestsrc is-live=1 pattern=ball ! video/x-raw,width=320,height=240,framerate=30/1 ! timeoverlay font-desc="Sans, 24" ! tee name=t ! queue ! autovideosink \
t. ! queue ! videoscale ! video/x-raw,width=640,height=480,pixel-aspect-ratio=1/1 ! videoconvert ! jpegenc ! rtpjpegpay mtu=%d name=pay0' % MTU)
#print(factoryJPG_pipeline)
factoryJPG.set_launch(factoryJPG_pipeline)
mounts.add_factory("/test_rtp-jpg", factoryJPG)

factoryVRAW = GstRtspServer.RTSPMediaFactory()
factoryVRAW_pipeline =  ('videotestsrc is-live=1 pattern=ball ! video/x-raw,width=320,height=240,framerate=30/1 ! timeoverlay font-desc="Sans, 24" ! tee name=t ! queue ! autovideosink \
t. ! queue ! videoscale ! video/x-raw,width=640,height=480,pixel-aspect-ratio=1/1 ! videoconvert ! rtpvrawpay mtu=%d name=pay0' % MTU)
#print(factoryVRAW_pipeline)
factoryVRAW.set_launch(factoryVRAW_pipeline)
mounts.add_factory("/test_rtp-vraw", factoryVRAW)

server.attach(None)

print ("stream ready at rtsp://127.0.0.1:8554/test_rtp-{mp2t , h264 , jpg , vraw}")
mainloop.run()

and you would test with:

# RTP/MP2T would give poor latency without optimizations
gst-launch-1.0 rtspsrc location=rtsp://127.0.0.1:8554/test_rtp-mp2t latency=0 ! rtpmp2tdepay ! tsdemux ! h264parse ! avdec_h264 ! videoconvert ! autovideosink

# RTP/H264 may be much better but may need two frames for P-frames decoding:
gst-launch-1.0 rtspsrc location=rtsp://127.0.0.1:8554/test_rtp-h264 latency=0 ! rtph264depay ! h264parse ! avdec_h264 ! videoconvert ! autovideosink

# RTP/JPG may be even better as it only needs one frame for decoding:
gst-launch-1.0 rtspsrc location=rtsp://127.0.0.1:8554/test_rtp-jpg latency=0 ! rtpjpegdepay ! jpegdec ! videoconvert ! autovideosink

# RTP/VRAW doesn't encode so not sure for your case but it might also require some kernel max socket buffer size adjustment for high resolutions
sudo sysctl -w net.core.rmem_max=25000000
sudo sysctl -w net.core.wmem_max=25000000
gst-launch-1.0 rtspsrc location=rtsp://127.0.0.1:8554/test_rtp-vraw latency=0 ! rtpvrawdepay ! videoconvert ! autovideosink

Note that this just measures the encoding and RTSP to localhost and decoding latency.
Most of the final latency may be from your camera and bus to system (USB camera?), or from your own processing. Be also sure to know your screen’s display rate for glass-to-glass latency evaluation.

Also be sure that for decreasing latency, increasing framerate is your easiest bet.

Also note that a simple way from python for a single client would be using flask application and its response module.
You may also have a look to this example.